

The top needs to be shaped. I used 400 grit on a sanding block.
On the right, I'm checking the shape looking at the back. It's easier to see the shape of the sides against a dark background.

The wing/fin assembly is glued down the pencil lines on both sides of the body tube. The trailing edge is even with the end of the body tube.
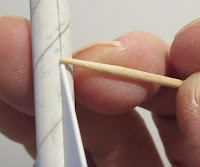
Here I'm adding a CA glue fillet using a toothpick.
Again, dip the tip of the toothpick in a drop of CA glue and transfer to the model.

From the instruction sheet -

There are two split shot nose weights. The Kevlar line is tied around the larger weight.

The larger weight sits on top of the internal coupler.

The shorter white body tube slides over that. The nose cone is slid in from the top and locks the weight in place (See illustration above).
The second smaller weight is slid in from the bottom up to the larger weight. Some glue is dripped in and locked in the lower weight.
No comments:
Post a Comment