Monday, March 31, 2025

Estes Advanced Target Drone, Kit #1913, Build, Part 2, Redrawing The Cardstock Intake

 
Here's the scan of the intakes from the Jim Z's website:

I appreciate the patterns, but sometimes the scans are a bit rough.
Good thing the ruler is on the scan!

I dropped the art into Corel Draw and drew a 1" square box.
The art was sized so the 1" square box matched the 1" measure on the ruler.


Notice how the intake pattern and the ruler aren't on the same baseline.

Drop down a horizontal alignment line. Double click the intake scan and you can rotate it.
Start drawing the outside cut lines and the inside fold lines.

To be sure the long top and bottom trapezoid shapes are the same size, I drew a box that aligned with the top half.
Copy and slide down the copied box to check the lower half height. 


The slot was drawn with a thin solid line,
The folds got a dashed line.


Great thing about computer graphics,
Copy the original, paste and drop down an exact copy.

Sunday, March 30, 2025

Estes Advanced Target Drone, Kit #1913, Build, Part 1, Parts


This will be a spare parts build.
Clockwise from left to right:
BT-50H (Heavy wall tube) 11" long
Apogee PNC-24C (a bit shorter than the original kit nose cone)
Odd'l Rockets 12" chute 
Some leftover Air Force decals I might be able to use
1/4 oz. Clay nose cone weight
3/32" Balsa sheet
1/8" dia. Launch Lug 2 3/8" long
20/50 Engine Mount
Round elastic shock cord
135 lb. Kevlar
More about the cardstock in an upcoming post.

Friday, March 28, 2025

Estes Advanced Target Drone, Kit #1913, Clone Build Background

The epoxy fillets on the Mega Initiator will take some time, I'll get back to that build soon -


Introduced in the 1983 catalog is the ADVANCED TARGET DRONE.
Kit # 1913, available from 1983 through 1985. Original cost was $6.00.
Information from Jerry Fortin's database: CLICK HERE

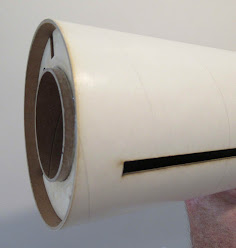
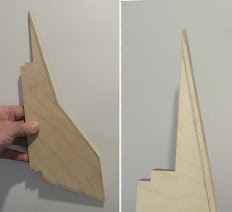
This is a four fin, nose cone model but has cardstock intakes that slot over the longer "wing" fins.
15.3" tall, 1.3 oz weight, BT-50 based with 18mm power. 12" parachute recovery.
The interesting part will be making the white decaled areas at home.
The build starts tomorrow!

Thursday, March 27, 2025

Builds On Display!

While the epoxy dries on the Mega Initiators -
Around a year and a half back, I donated ten display builds to Colonial Hobby in Orlando, Florida.

I checked back last December and the models were still in a cardboard box, sitting on top of a file cabinet.
I let them know if they weren't going to display the builds, I'd rather have them back. They took the hint and finally put them on display!

Most all these are my builds, from left to right - 
The Andromeda, Long Tom, Sprint XL, Alien Invader, Laser Lance, Scram Jet, Bullpup, Goblin, QCC Explorer, Little Honest John. I don't know who built the others.

They did honor my one request - keep them out of reach! They are up on a shelf at the back of the store, to the right of the rocket kits.

Wednesday, March 26, 2025

Aerotech Mega Initiator #89541, Part 11, Gluing In The Engine Mount

Test fit, test fit, test fit -  before gluing on the centering rings.

The mount is slid into the airframe tube and the fin tabs slipped into the fin slots into the centering ring notches.

Here I've marked the position of the bottom edge of the ring with masking tape.
This allows me to apply the epoxy to the upper side of the ring. After that dries, the tape is pulled and an epoxy fillet is applied to the underside joint. Repeat the epoxy fillets on the other centering rings.

You are given the choice of gluing in the mount then attaching the fins or - 
Extend and cut the fin slots down through the bottom of the body tube. The fins are glued onto the mount then the entire assembly is slid into the tube thru the extended fin slots.

I decided to not extend the fin slots. Sometimes this extended cut allows the tube end to flare out.


Before you use epoxy - 
Some people are allegic to epoxy. Use a gloved finger to smooth out epoxy fillets.

With the fins dry fitted in their slots, 
this puts the low centering ring just under 7/8" from the end of the airframe tube.


To glue the upper ring in place,

Slide the mount down, about 1/4" below the final position. 
This lowers the mount and upper ring. Epoxy can be applied from above, then the mount slid up into the epoxy glue ring.


I used a dowel to reach and apply a ring of epoxy glue.

With the upper ring in the lowered position, the dowel was marked to be used as a depth guide.


To reach in with the epoxy,
Roll just the end of the dowel in the glue. This is set into the tube up to the mark and rolled around the tube wall. 
Continued next post -

Tuesday, March 25, 2025

Aerotech Mega Initiator #89541, Part 10, Final Fin Fill & Dry Fits


The fins on the flight version were left square.

That inside leading edge angle still wouldn't match up. I added some CWF for a better flow.


Here's the same fill after sanding. Some 400 grit was wrapped around a pencil to sand the angle.


Another dry fit of the fins showed the ring slots were too tight.

The sides were shaved down, widening the slots.


Here's how far the engine mount is recessed, the ring face is just under 7/8" from the end of the tube.

With the fins in the slots set the placement depth of the  engine mount.

Monday, March 24, 2025

Aerotech Mega Initiator #89541, Part 9, Assembling The Engine Mount Adapters


In the last post, I did some dry fits until the rings were tight on the tube, but still moveable.

Here I'm using the flat face of my sanding block to get the lower ring flush and square with the end of the motor mount tube.


Here's the engine mount ready with the upper ring 1" from the top of the tube.

A dry fit ready for the epoxy fillets.
Epoxy fillets were applied with a gloved finger and smoothed with alcohol.

In the picture, I've applied a fillet and am removing most of it with a Q-tip. This is the ring that "sockets" into the larger engine mount tube. You don't want excess glue to hinder the fit.


The finished adapter.

The other two mount assemble and glue up the same.

Sunday, March 23, 2025

Aerotech Mega Initiator #89541, Part 8, Ring Diameter Sizing


Both the inside and the outside edges of most rings need to be sized to slide into or over the tubes.

I used a combination of a sharp knife and a half round diamond file to slightly increase or decrease the diameters. I found that removing the laser ash brought them to almost the correct size.


The additional motor mounts need some sizing.

That smaller (inside) ring should slide into and almost "lock" into the largest mount tube.


That required a slight angle sand.

Sand a little, test the fit and continue until it friction fits into the larger motor mount tube.


This is the adapter bulkhead.

The instructions don't mention it, but put a washer on both sides of the ring. The screw eye and threaded bolt are locked in place with some epoxy.  

Saturday, March 22, 2025

Aerotech Mega Initiator #89541, Part 7, Prepping More Parts!

I know there is a LOT of parts prepping - 
Ask any wood worker. The secret to a great finish is good surface preparation.
   
Here's that inside corner on the leading edge of the fins.

On the top picture - 
With the primer shot, you can see the mismatch of the rounded leading edge at the center of the angle. Some corrective sanding was done.
Here's the same corner after a directed shot of filler/primer. More careful sanding should get things in line.

The fin after the second coat of filler/primer - 

There were some small lines that needed some CWF and more sanding.


It seems every slot was a hair too narrow.
The root edge notches and the fin slots in the body tubes were widened for a better fit.

I could slide my sanding block into the slots using 220 grit.


The fins were test fitted. 
The joint of the body tube and root edge was very good now, tight enough with no distorion of the tube..

Friday, March 21, 2025

Aerotech Mega Initiator #89541, Part 6, Fin Filling


One of the fins had a knot hole fill.
It won't be noticeable with an easy CWF fill and sanding.

This fin will go on the flying build.


Here's that inside angle trouble spot I mentioned earlier.

When sprayed with filler/primer you can better see what needs to be cleaned up with better rounding.


The root edge and fillet areas were taped off for the filler/primer spraying

The fin in back is before sanding,
The fin in front is after sanding with 400 grit.


Here's a close up of the sanded fin surface. 
It's easy to see the gray filler left in the shallow grain.

Thursday, March 20, 2025

Aerotech Mega Initiator #89541, Part 5, Fin Shaping


The fins are 1/4" thick, five ply plywood. The plywood is very high quality.
The instructions don't mention it, but I'm going to round the edges on the presentation model.

I drew a pencil line for reference all the way around the exposed outside edges.


I started by knocking down the edge at a 45 degree angle with some 220 grit on a block. Sanding with the block helps keep the width consistent.


The tricky part is where the concave edge meets at the break in the leading edge corner. This took the most work.
You won't be able to judge how well the rounded edges meet until you spray it with some filler/primer later on.


On the left,
is the first rough knock down of the right side trailing edge.

On the right is a good rounded edge on a different fin.
I wouldn't sand the blackened laser cut root edge until you check the fit before gluing the fins thru the wall and against the motor mount tube.

Wednesday, March 19, 2025

Aerotech Mega Initiator #89541, Part 4, Tube Fill And Prep


The presentation model main airframe tube got the seams filled. The picture shows the thinned CWF applied. The tubes will still get a good shot of filler/primer and sanding to complete the two-step fill. 

Even with the heavy walled tubes, you can still get some extra support by sliding in the coupler. This prevents any distortion of the tube when sanding at the weaker fin slot areas.


The engine mount tubes are sanded for better adhesion of the centering ring epoxy.


Here's that "zero end" metal straightedge, no rounded overhang.

It's easier to accurately position centering rings when you can get the ruler edge against the ring wall.

Don't glue the rings on yet. This was just a test fit.
 

Tuesday, March 18, 2025

Aerotech Mega Initiator #89541, Part 3, Ring Fitting

There are a lot of centering rings with all the motor mount adapters.
I usually sand off the laser cut burn marks from the flat faces of the centering rings. 

The ring diameters are just slightly big and will require some sanding for a friction fit over and inside the tubes. 

Note the tubes have the words "AFT" and MID" burned into them.  


Test fit all the rings on the tubes before sanding the edges. All my supplied rings were a little too tight.

I prefer rings that are cut a bit large so you can sand to a perfect fit.


The T-Nuts are hammered into the inside face of the rear centering ring.
After the t-nut is in place, epoxy glue is set around the outside edges of the nut.
 

Monday, March 17, 2025

Aerotech Mega Initiator #89541, Part 2, Parts Prepping

The laser burns should be sanded off the exposed edges. 
Charred edges won't accept paint well, the burnt edges can show through lighter colors.

The rear fin shows the charred sides, the forward fin is after sanding with 320 grit on a block.


I'm building two rockets, one for display, the other for flight.
The display rocket will have rounded fin edges, the flight model will have squared off edges.

Here's the outside edge before sanding.
The leading edge (toward to top) has been sanded. You can see the plywood layers.


Always check body tube edges. 
The larger the diameter, the more likely you'll see a rough cut.

Sand the tube ends flat using 220 grit on a block. Follow with 400 grit to smooth.

Sunday, March 16, 2025

Aerotech Mega Initiator #89541, Part 1, Parts


 All the parts, going left to right:
The 54mm Motor Mount Tube
38mm motor mount tube
29mm Adapter tube

Quick Link and hardware
Red elastic shock cord
36" parachute
Four packs centering rings, adapter rings and bulkhead


The main airframe tubes:
28" x 4" diameter body tube with three fin slots cut

12" payload tube
4" diameter black nose cone.


Three fins laser cut from 1/4" thick plywood.

Saturday, March 15, 2025

Aerotech Mega Initiator #89541, Part 1, Background


From the Aerotech website - 
AeroTech has upscaled it's famous Intitator into the Mega Intitator! Designed for multiple motor mounts and ready for anything from G to K motors, this kit is a great way to transition into high-power rocketry, or just fly a large rocket on a G motor. The kit comes fully loaded with everything needed to achieve Level 1 and Level 2 certification including motor retention, 29mm and 38mm motor adapters and a full recovery system. Features 4 inch pre-slotted airframe, 12 inch payload bay, 9 ounce Polypropylene nose cone, 15 -inch nylon shock cord, 54/38/29mm Loc-N-Mount with Motor Retention, Fin-Lock Rings, Heavy duty 1/4 inch launch lugs and conformal rail guides.

I'm not usually a mid power builder. I have built a few in the past.
Two Mega Initiator kits are being built for Aerotech, one for display, the other for flight.
The builds start tomorrow!