Tuesday, February 7, 2017
Estes Sprint XL #7224 Build, Part 6, Lugs and Primer Fill
The launch lugs have to be cut in two.
The original smaller Sprint had two lugs only 1/4" long. The lug ends were cut at an angle.
This lug is simply cut in two.
To get a straight cut, wrap some tape around the lug at the halfway mark. Slide a dowel inside to support the lug, otherwise it could collapse.
As suggested by Eric James Blitchok in an email,
TIP: An aluminum angle was used to check the alignment of the two lugs.
I used to check with a launch rod slid into or set beside them. The aluminum angle works better. You can slip it on from the side, adjust the lugs and remove it while the glue dries.
The lugs got fillets and then another fillet with Titebond M&TG.
The nose cone and tail cone were slid in and the model got a shot of Duplicolor primer/filler.
Here's how they looked after sanding. I tend to take off most all the filler. For me it's used to fill any remaining body tube seams and balsa grain after the CWF is sanded down.
Some filler/primer was left in the molding seam in the nose cone.
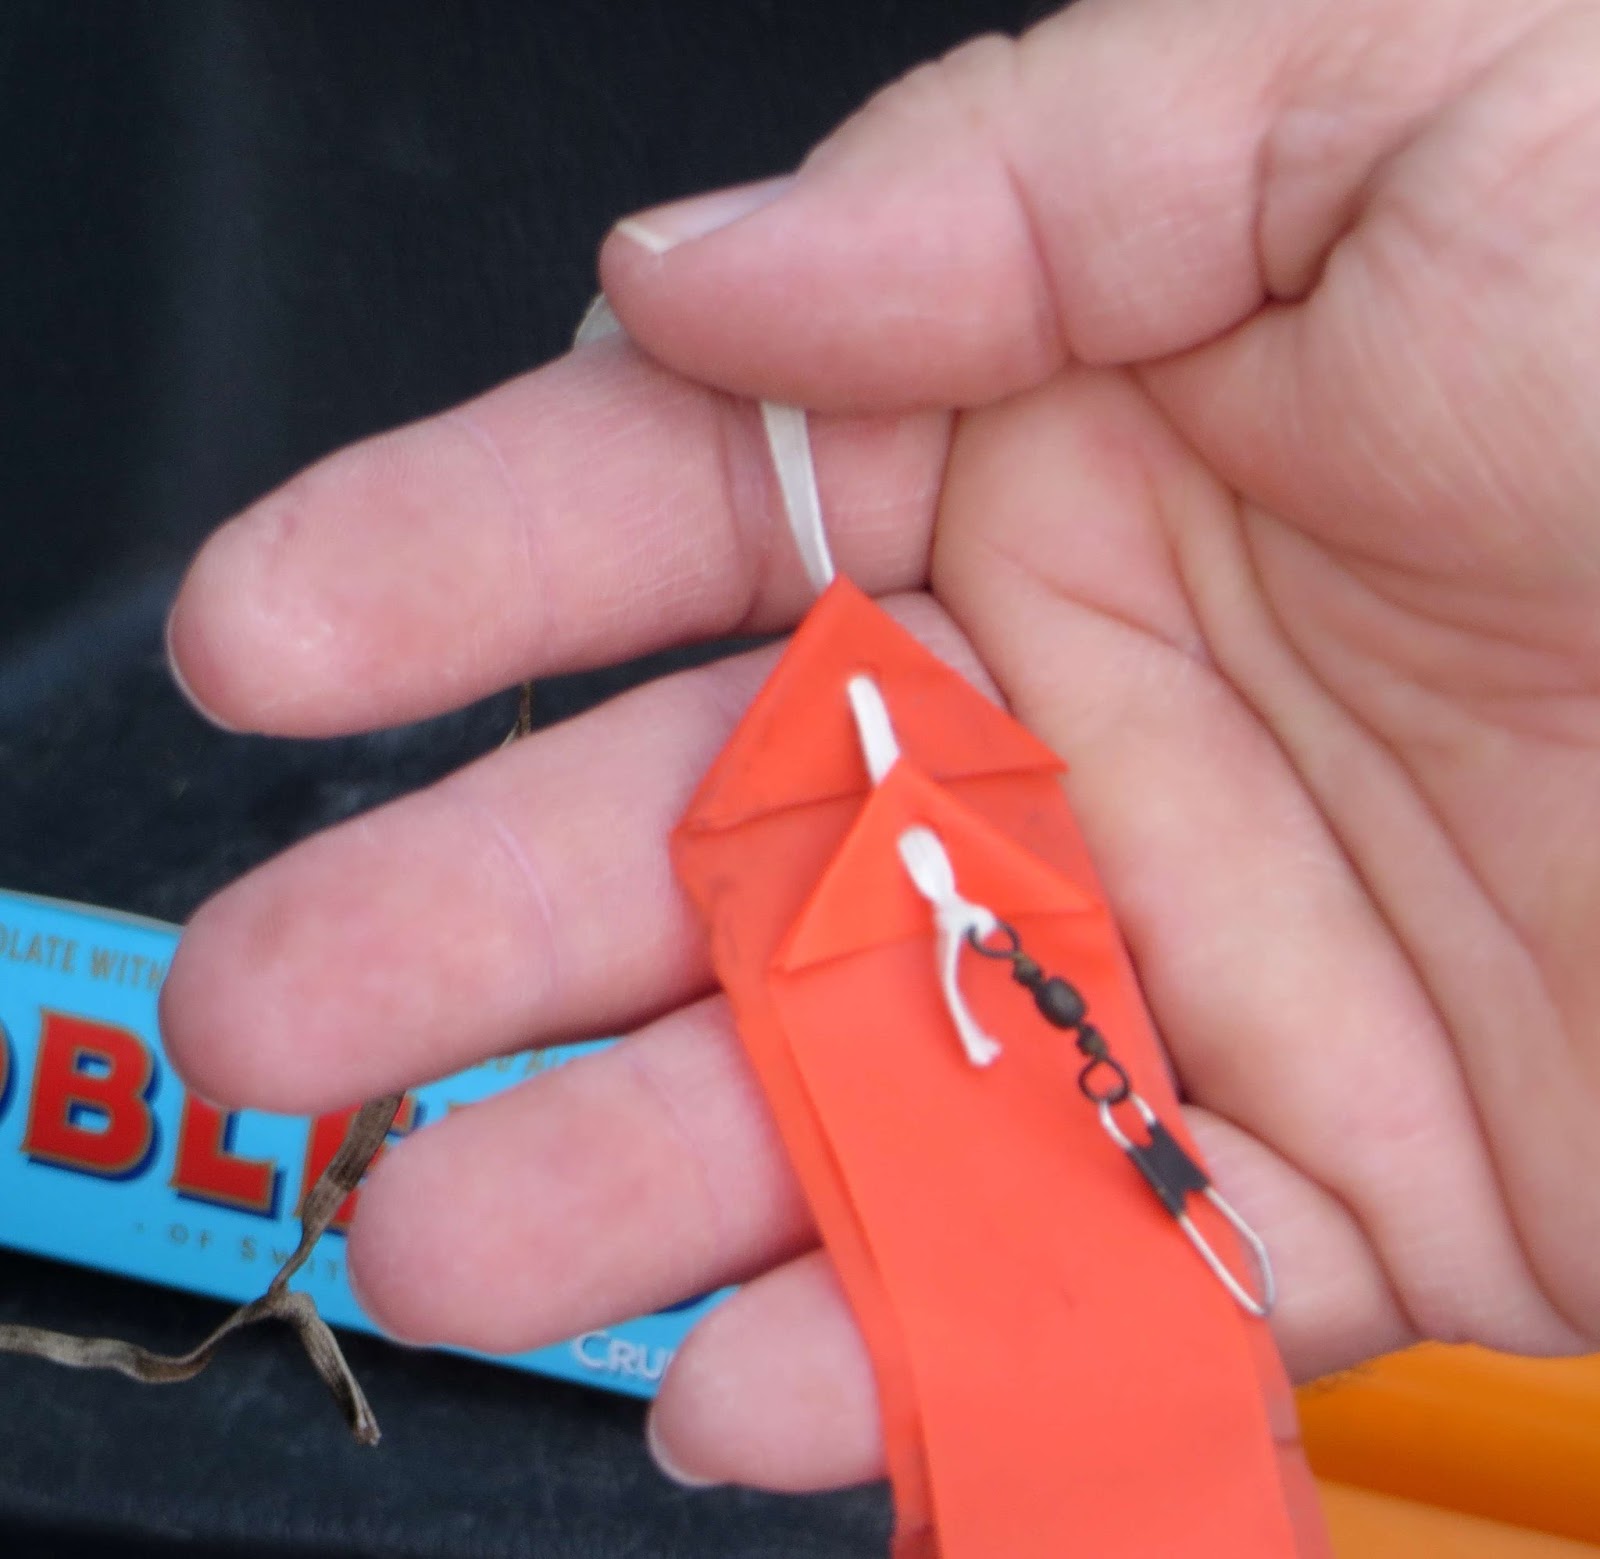
Lonnie B's Streamer Attachment TIP
Lonnie B. showed me his method for attaching a streamer to a shock cord. This is so much stronger than what I've been doing - using just a reinforcement disk stuck on both sides of the streamer.
When this triangular top fold is made, the shock cord is tied through four thicknesses of the streamer material.
Pictured to the left is two streamers on the same line. You could use a single streamer.
Here's how it's done, the dashed lines are the folds.
Step 1: Fold the upper right corner down and to the left so the sides are even.
Step 2: Shows the first fold.
Step 3: Fold the upper left corner down and to the right , the tip is even with the right side of the streamer.
Step 4: Punch a hole in the center of the triangle fold and tie on the shock cord.
When this triangular top fold is made, the shock cord is tied through four thicknesses of the streamer material.
Pictured to the left is two streamers on the same line. You could use a single streamer.
Step 1: Fold the upper right corner down and to the left so the sides are even.
Step 2: Shows the first fold.
Step 3: Fold the upper left corner down and to the right , the tip is even with the right side of the streamer.
Step 4: Punch a hole in the center of the triangle fold and tie on the shock cord.
Monday, February 6, 2017
Patreon?

I spend a lot of time building rockets and preparing the blog posts, answering emails,
drawing up PDFs, sending out decals and Saturn V blog books.
If the blog is to continue, I'm asking for donor support.
If you are not able to donate, I understand. There are other ways to help out.
Buy an Odd'l Rocket kit, bid on an Ebay rocket or simply click on the ads.
If I reach my patron goals the blog ads will disappear!
If you use PayPal, donations are handled automatically.
A BIG THANKS FOR YOUR SUPPORT!
The Model Rocket Building Blog was started in 2010 with an average of 650 posts per year! Post content includes step by step model rocket construction whether from a kit, classic or custom design. Model rocket trivia, tips and history of the hobby are also featured.
Estes Sprint XL #7224 Build, Part 5, Fin Shaping
In the original Sprint kit you had a choice to either airfoil the fins or round the edges.
These new instructions say to round just the leading edges. That didn't make much sense given the shape of the fins. I decided to round it all - the leading edge, outside tip and trailing edges.
The edges are knocked off with a sanding block with 220 grit. (See inset)

The real rounding is done with a small piece of 220 grit and fingertips. The final round is shown in the inset picture.
The fins were filled with CWF and sanded smooth. One fairly thick coat of Duplicolor Filler/Primer followed. The filler/primer fills any remaining wood grain.
I read on the forums where some builders do many applications of filler, then three or four coats of primer sanding between coats.
That's an awful lot of work!
For me, brush on one coat of CWF and sand, then one (somewhat heavy) coat of Duplicolor spray primer/filler and sand.
Many use the cheaper Rusto Filler/primer. I tried it and it was very rubbery, too hard to sand. Try the Duplicolor Primer/Filler once and you won't use anything else.
White undercoats follow that, usually with a bit of smooth sanding to remove any rough spots.
These new instructions say to round just the leading edges. That didn't make much sense given the shape of the fins. I decided to round it all - the leading edge, outside tip and trailing edges.
The edges are knocked off with a sanding block with 220 grit. (See inset)
The real rounding is done with a small piece of 220 grit and fingertips. The final round is shown in the inset picture.
I read on the forums where some builders do many applications of filler, then three or four coats of primer sanding between coats.
That's an awful lot of work!
For me, brush on one coat of CWF and sand, then one (somewhat heavy) coat of Duplicolor spray primer/filler and sand.
Many use the cheaper Rusto Filler/primer. I tried it and it was very rubbery, too hard to sand. Try the Duplicolor Primer/Filler once and you won't use anything else.
White undercoats follow that, usually with a bit of smooth sanding to remove any rough spots.
Sunday, February 5, 2017
Launch, Orlando R.O.C.K., Februry 4, 2017
We had wind gusts and mild temperatures today. Brian C. said 35 flyers signed in.
My SPUDNIK doesn't always fly perfectly vertical. With an A10-3t engine it struggled for stability reaching about 100 feet.
The MPC RED GIANT was an "alternate" launch. Pad A1 was announced but the Red Giant on C3 launched! Straight and true with a B6-2 to about 225 feet.
The GALACTIC TAXI had a first flight with an Estes A8-3. Very stable to an estimated 200' feet.
At ejection the large spill hole parachute carried it South into the scrub but just before the tree line.
Here's one that will be covered on the blog soon, the NIKE GOON. Built from a Baby Bertha kit and based on the upcoming Estes Nike X.
The Quest B6-4 took it to 300'. All the parachute flights today used the same spill holed parachute, the snap swivel allowed easy swaps.
Even with the angled launch rod, the Nike Goon drifted South like the last flight and towards the trees. I found it bound up in some low twigs. It took a minute to untie it with no damage.
Chris Hubbard and his wife were visiting Central Florida from Canada. He always brings interesting things to fly. Today he brought the Estes Exoskell.
The C6-3 labored as the rocket turned horizontal into the wind. It ended up on the ground before the ejection charge went off. That alien had a hard landing.
Lonnie drag raced two custom Alphas.
He found the triangular Toblerone box was a good fit over the BT-50.
With streamer recovery the landing was harder than desired, the old fins were brittle.
Finally for me, a favorite - the Quest X-15.
Some X-15s were unstable. To compensate, my build had a slightly longer body tube and some added nose weight.
By now I was angling the rod into the wind even more. With an Estes B6-4 altitude was estimated at 300'. Recovery was on the grass with a short walk to pick it up.
Five up, five recovered then lunch with the gang at Del Taco!

Saturday, February 4, 2017
Estes Sprint XL #7224 Build, Part 4, Engine Mount & Kevlar
Look close at the ends of the tail cone. There is a slightly raised molding lip.
I used my sanding block with 220 grit to straighten out the sides.
The engine block sits inside the end of the engine mount tube. Use a D engine casing to set the block so it won't be glued in at an angle.
The instructions say to glue the upper centering ring even with the top of the engine mount tube.
TIP: For a stronger mount the ring was glued about 1/8" down from the top. This way you could put a glue fillet on both sides.
A 150 lb. Kevlar line was tied below the upper ring.
The mount is set beside the main body tube to get the right length of line before the mount is glued in.. You'll want the Kevlar tie loop below the top of the body tube to prevent a zipper tear.
Buzz Nau's Rocket Website
Here's a rocketry website well worth visiting -
BUZZ NAU'S MODEL ROCKET PAGE - CLICK HERE
The plans include some 18mm models Buzz developed for THOY.
The Centuri documents CLICK HERE contain technical reports and some extra pages that were included in the Centuri kits.
Lots of pictures of Buzz' fleet are posted - CLICK HERE.
Subscribe to:
Posts (Atom)