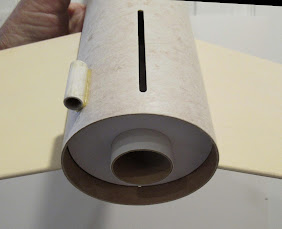
I marked the inside with a pencil held 2 1/2" from the lead tip.
Here's a pencil line on the outside, 2 1/2" above the low end.
Look close - you can see the centering ring through the fin slot with the engine mount slid in position. The ring will hit the glue ring and push the glue forward about 3/16".
A dowel was marked at 2 1/2" for the depth gauge. A ring of glue was applied around the top. Roll the glue inside stopping at the pencil mark.
I used two fins slid in place (no glue yet) to lock the engine mount in the correct position.
A glue fillet is applied at the joint of the rear ring and body tube.
The instructions say to apply a glue fillet to the upper centering ring. This can be applied from the top using a longer dowel. It isn't easy, but can be done.


No comments:
Post a Comment