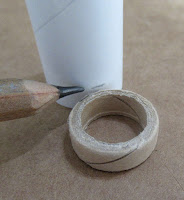
The original kit did not have an engine block. I added the engine block.
The centering rings were way too tight around the BT-20J engine tube. 400 grit sandpaper was wrapped around a finger and the inside burr was sanded down.
On the right, a notch was cut in the upper ring for the Kevlar and engine hook fit.
Here's a dry fit of the rings and engine hook. Kit instructions typically have the upper ring even with the top of the engine tube.
TIP: For a stronger mount - Position the upper centering ring down over the top bend of the engine hook.
TIP: Sand the face of the low centering ring flat before gluing onto the tube. That low face of the ring will be exposed on the finished model, when even with the end of the BT-50 main airframe tube. You'll want that flat surface smooth.
Cut off the excess and press the end into the wet glue fillet.
Mentioned earlier, a engine block was glued into the top of the mount even with the top of the tube.


No comments:
Post a Comment