Here's the first vertical bar placement, centered between two fins.
If you were to turn the rocket to the left and the next two facing fins, the next vertical bar is placed just to the right of the fin root edge on the left. Check the roll pattern drawing in the previous post.
I set the vertical black bar down first, then set the horizontal silver bar on top of that. The instructions say to cut the long silver into thirds, but that 1/3 length decal is a bit longer than the space between the two fins.
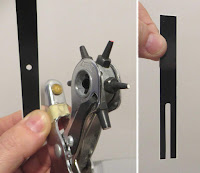
There is only one fin band that needs to be cut to fit over the root edge.
This is one way to do it, punch a hole and extend the side cut to the bottom. Mine didn't turn out well, The hole I punched was too wide. It would be better to cut the slot smaller than the 3/32" thick fin root edge and have a bit more decal to roll up and onto the fin. The old decals were brittle and it broke up while I was trying to place it. I'll have to print some new decals and try again.
The square goose is set on after the largest wrap decal has dried. There is a little white border around it.
Note the position - the goose is (flying) facing up to the nose cone. On the other side it is flipped but still facing up.
This is the upper section.
According to the older kit decal placement, the the black C.A.R.D.E. decal pictured in the 2019 Estes catalog is incorrect. The black print C.A.R.D.E. decal is set on the other side of the upper launch lug (over the top) and reads down.
This picture was taken before I peeled off the black CARDE decal and placed it correctly.


No comments:
Post a Comment