
I've built a few Saturn Vs on the blog before.
To find those full builds: CLICK HERE
You'll have to scroll about half way down to find the 70th post, the build is from finish to start. 


You will need a long dowel to reach the front end of the long nose cone.
The #1973 Skylab is very similar to the #1969 Saturn V kit except for the upper section.
The highest transition and Apollo capsule has been replaced with the Skylab payload nose section.
Some of the new parts are shown above.
Each pay of clay weighs around .25 oz. each.
There are six of them for a total nose weight of 1 1/2 oz.
These have to go all the way into the tip of the nose cone.
I find it eaiser to cut the pat into small pieces and roll them into little balls.
They are easier to drop in a few at a time rather than chase a clay snake around the inside of the nose cone tip.
The inset picture shows all the clay in place, tamped down evenly by the dowel end.
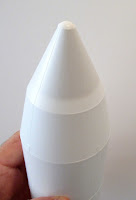
With a bright light behind it,
you can check how the clay sits in the nose cone.
So glad you're doing this. I've been afraid to start mine because I haven't been able to find much help in how to paint that roll pattern. The Estes instructions don't help much at all.
ReplyDeleteThanks Mark,
DeleteI'll be getting into some detail on the paint. I may have to reference Alway's Rockets of the World for additional info.