

A rolled clay weight "snake" was pressed into the Bic pen tube inside the top section.
I used the plastic pen barrel so the clay wouldn't discolor the white cardstock over time.
The model will separate between the B1 and B2 sections.

The B1 section was glued to the A2 already glued to the uppermost A1.
To smooth out the seam, a clean dowel is rolled over the edges. Whatever wet glue is in the edges makes the cardstock pliable. You can roll over any edges that stick out.
 The (longer than needed) BT-5 is pushed through the lower body centering rings and out the top. Don't glue the internal BT-5 tube in place yet.
 I don't know what the cut length will be yet.
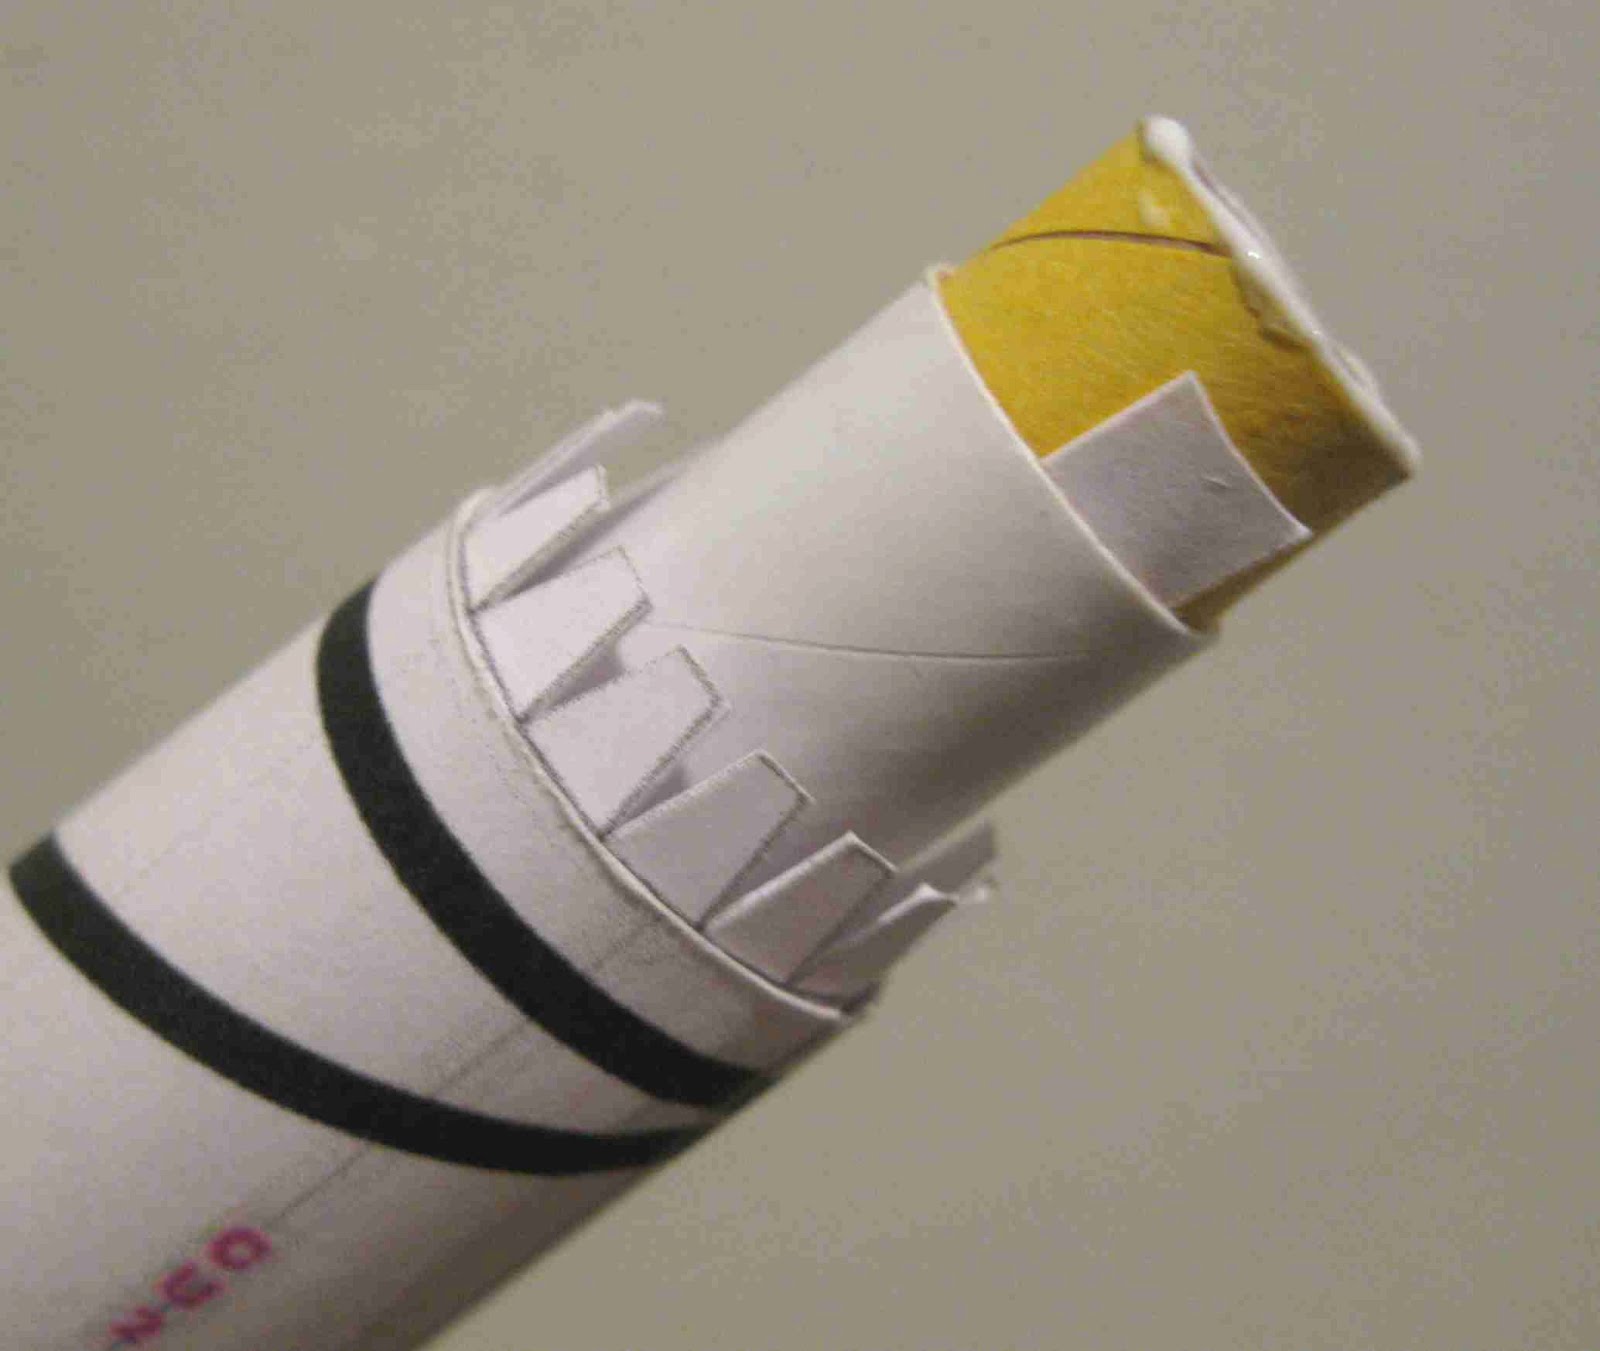
A coupler needs to be glued into the upper section so the BT-5 will join to it.
A 1/2' long section of an Estes engine spacing tube was cut and friction fit with cardstock into the BT-5 extending out the top of the lower section.
(I'll need to pull the BT-5 out after the coupler is glued in place.)
You can see the glue ring at just the top of the yellow coupler.
 The upper and lower halves were pressed together. When the yellow coupler made contact with the support ring inside the upper section, the BT-5 slid down through the lower half until both halves of the model were joined.
 When the glue was set up, the lower half was removed leaving the yellow coupler glued to the upper half.
Out the back end, the long BT-5 will be made into the nozzle. For the time being, the extended tube is used for a handle to help when building the low end of the model.
No comments:
Post a Comment