

Forming the escape nozzles is confusing. I would have preferred a simple cone shape with a glue tab on one side. For some reason the nozzle sides are double thickness.
TIP: Cut the center of the nozzle first. This gives you something to hold onto with your left hand. The wiggle line curves are tight, use sharp, tight scissors.
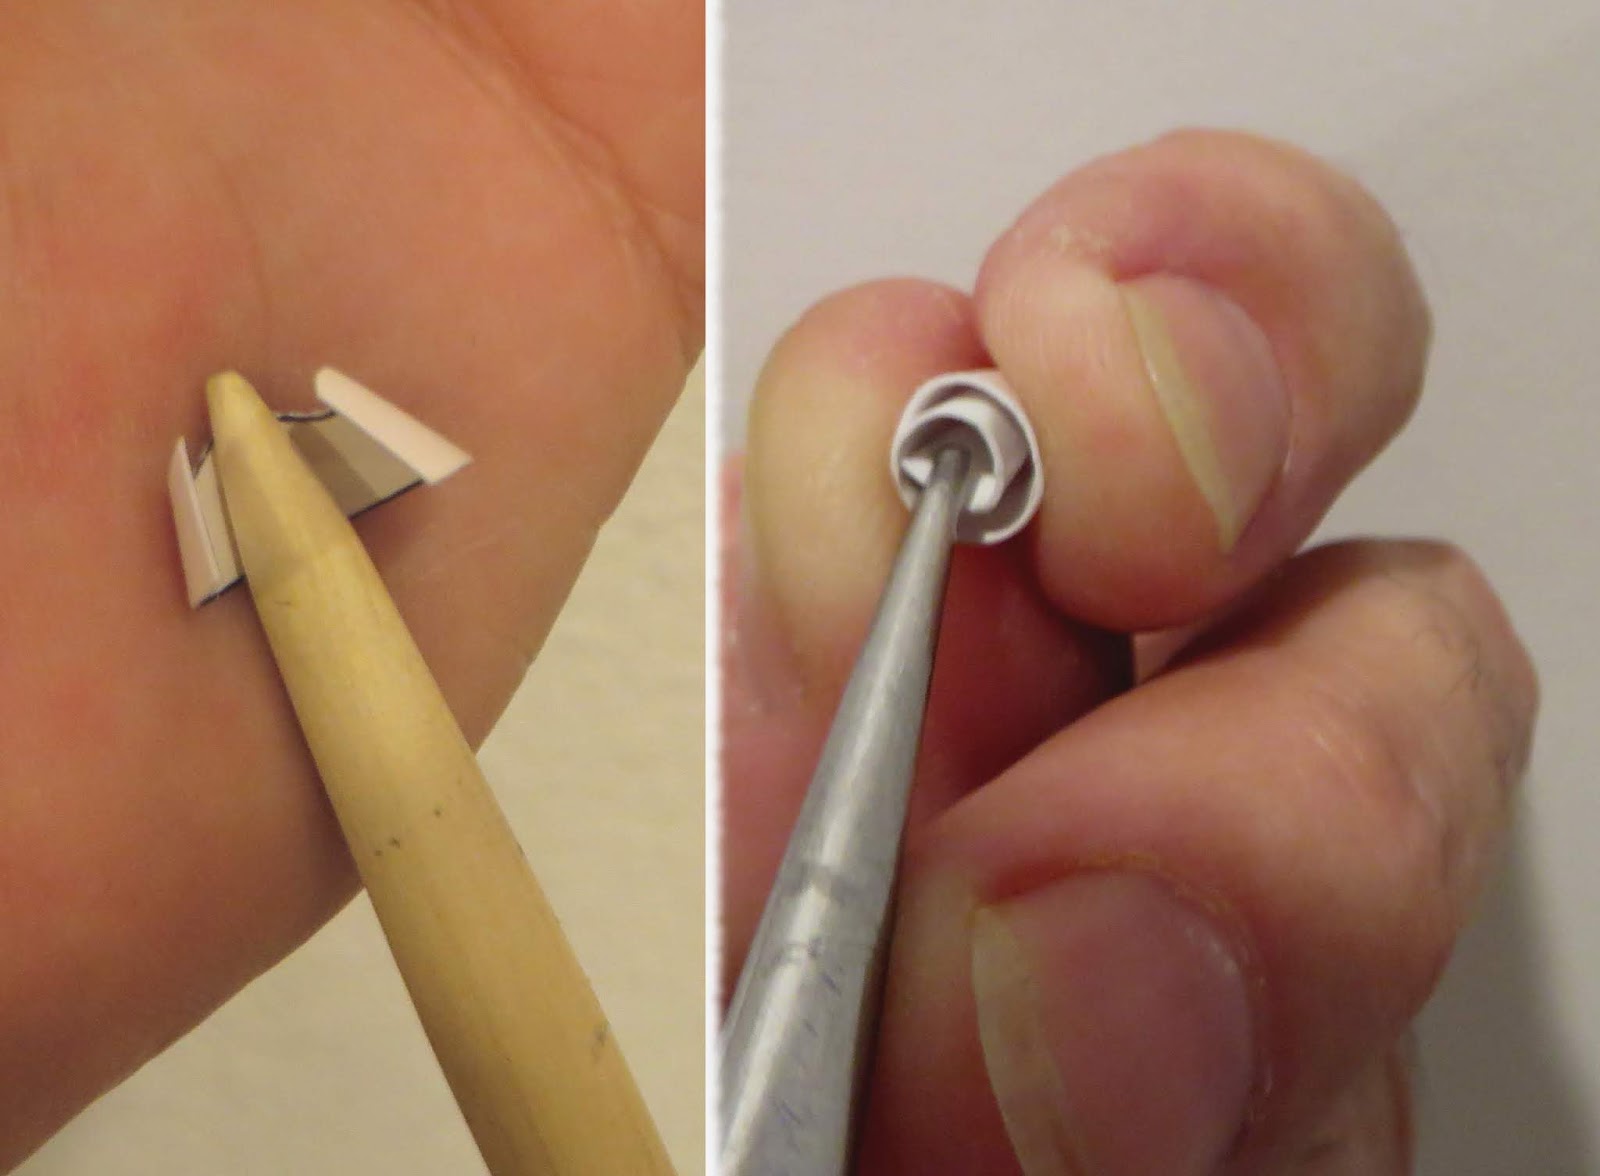
TIP: The instructions say to form the nozzles around a sharpened pencil. You might find it easier to use a sharpened and smooth dowel. Form the curve in the heel of your (clean) hand.
The curve will end up being tighter than you would expect.
TIP: I had to grab the inside edge with long tweezers to turn the card stock tight to make the nozzle smaller.

When the curved top edges match up, mark the overlap edge. This is a reference for when the glue is applied.
TIP: It's not necessary to glue all of the overlap, I glued just the end 1/8" of the overlap. DON'T USE TOO MUCH GLUE! Just a little wipe of glue will hold the nozzle end.
TIP: Use smooth tweezers to hold the flap down until the glue sets.
 The inside wraps will be loose.
To close up the wrap, apply a little glue under the inside edge slipping it under on the tip of your knife.
Immediately insert your tapered dowel and turn the dowel so it moves the loose wraps against the outside wall. Here I turned the dowel counter clockwise. Work quickly so you don't glue the dowel inside the nozzle.
Build time this post: 45 minutes
Total build time so far: 12 hours, 30 minutes
No comments:
Post a Comment