

Jumping around again:
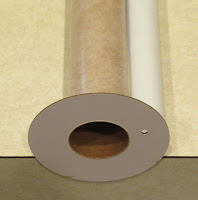
The centering ring with the small hole in it is glued even with the bottom of the core body tube. That small hole designates it goes on the bottom.
TIP: Don't make you fillet too wide, the eight outside tubes have to fit against the core tube.


I thought it would be tough to get full paint coverage if I tried to spray after the tubes were glued on. All eight tubes were taped down and sprayed gloss white. After this dried, the tubes were turned to spray the backs.
TIP: If you ever build a Saturn 1B with the alternating black and white booster tubes, spray them black and white before gluing everything together. It would be very difficult to mask them after assembly.

A pencil line was drawn down every tube using an aluminum angle.
With a sanding block, the paint was sanded off for a better contact gluing line.
As the instructions show -

Set the low centering ring over the edge of a table or counter top.
The first tube is glued on using the flat table top to keep it in line.


GOTCHA: Glue one side tube on to start, the go around the core tube gluing tubes on side by side. Notice the arrow I drew on the instruction drawing on the right.
The illustration might imply the outside tubes one (left side) and five (right) lay flat on the table top.
DO NOT glue the tubes from the outside working into the center. Start on the side, go over the top and down the other side.
You should end up with tubes one and five not touching the table top.
The picture at the right shows tubes 1-5 sitting above a straightedge.
Glue on the remaining tubes.
Build time:
Glue on rear ring: 10 minutes
Paint booster tubes: 15 minutes
Sand & Glue Tubes: 35 minutes
Total build time so far: 13 hours, 25 minutes
No comments:
Post a Comment