
 When dry fitting, I had a heck of a time trying to get the tower sides to line up.
The Estes instructions have you assemble the tower from the bottom up.
In the Estes instructions you start by gluing the Antenna Housing cap on. You aren't told where to center the side supports over the holes. This is pretty critical.

If the tower sides are glued from the bottom up you can see how they angle out at the top, not inward. The tower top should taper in.
The V struts on the antenna housing set into the tower side holes at a slight angle, not straight on.
In the end, the tower plastic sides will slightly bend in right above inverted "V". This bend is made under pressure when the ends are pressed into the holes in the antenna housing.
You'll find it easier to do it the Centuri way, from the top down.
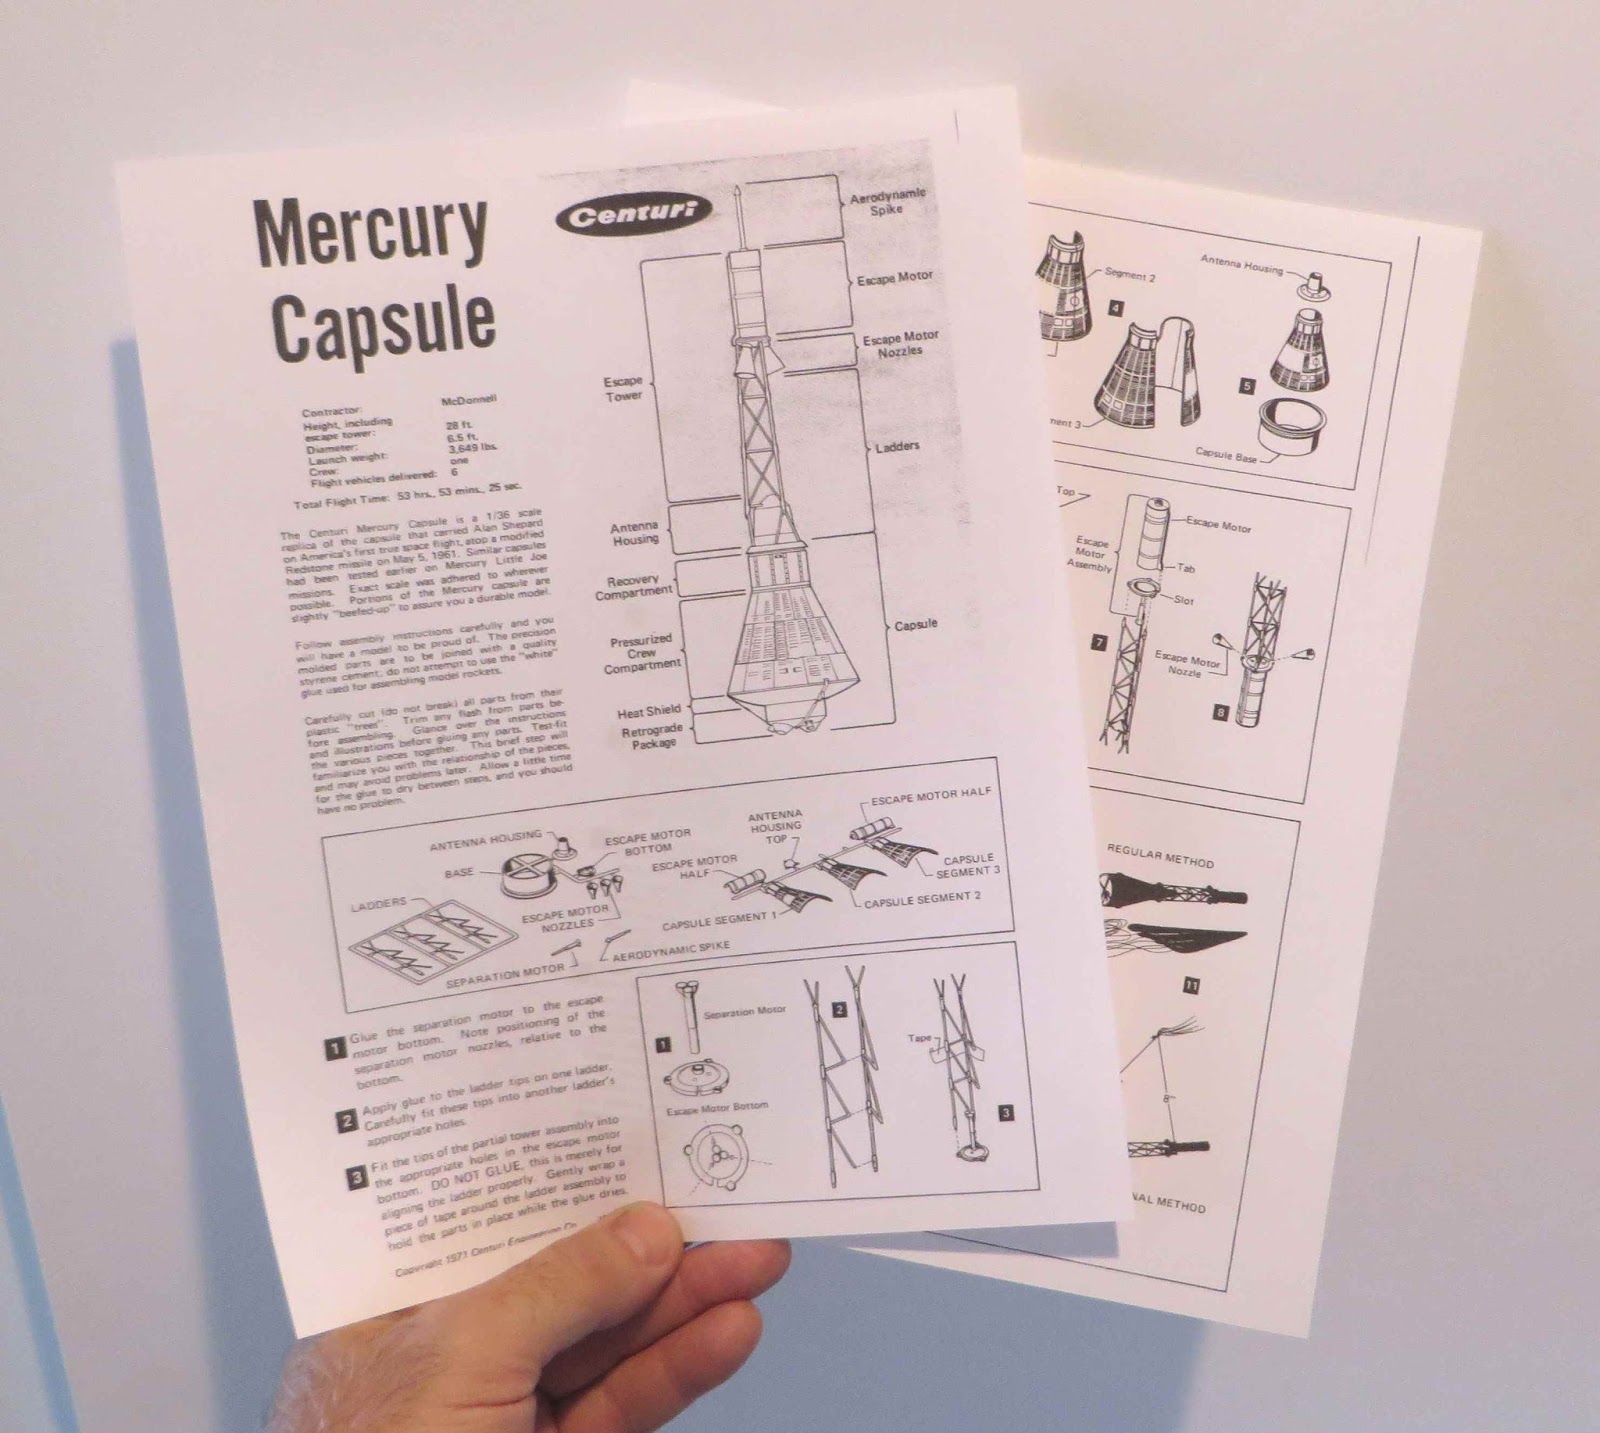
At the right are the Centuri pages printed from the JimZ site.
Those instructions were on pages were 5, 6 & 7.
Here's the JimZ address: CLICK HERE or I have JPEG copies available for Patreon members, email me at oddlrockets@bellsouth.net and ask for the Centuri Mercury Capsule Instructions.

TIP: When tied this way - Even if the tower were to pop off the capsule, it will still remain tethered to the capsule and parachute.
The Centuri (and older Estes) instructions also say not to glue in the tip aerodynamic spike. "It is intended for display purposes." If flown, sooner or later that spike will break off and be lost.
Here's some previous builder insights from RocketReviews.com
David Fergus review:
"The tower struts were the only plastic pieces that didn't fit together perfectly, so I worked my way up from the bottom gluing one joint at a time, and letting it set before I did the next one."
Tim Burger review:
"If you are going for an all out scale model, paint the ladders, motor bells, jettison motor and “hat” before you assemble them! The base ring around the hat should be aluminum or silver, the rest of the nose should be flat black, and the ladder and motor should be bright red (the instructions make no mention and show no illustration regarding this). The tube molded into the main escape motor along the side should be black. Paint the inside of the bells black while you are at it. This will produce a much nicer model than the method shown in the plans."
Pre-painting the capsule and tower separately might be a good idea.
No comments:
Post a Comment