There is a lot of balsa on this model!
Those small pieces in the bag are the launch lug "gun" stand offs. Those weren't on the JimZ templates. I took my best guess as to their length and height.
TIP: During assembly, keep small parts in separate zip-lock bags. The next time you lose a small part, remember this post.
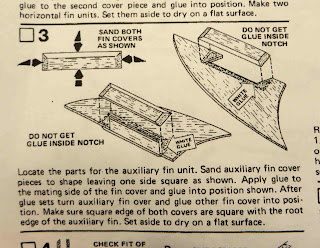
This model is interesting in that the low fin is removable for display. Two side pieces are glued on, centered around a long notch. This allows the fin to slid over a small piece glued onto the bottom of the model.
Maybe the designer wanted the model to be displayed horizontally on a shelf. There are two "skid fins" on the bottom, two on the rear, one in front. With the lower bottom fin slid off, the model can sit on the skid fins.
This large fin must be on the model for flight stability.
The side pieces get an interesting taper.
I'd recommend using a sanding block and 220 grit sandpaper. Draw the side widths with pencil before sanding.
All the fins pieces were filled with CWF and filler/primer.
Center the side pieces over the notch.
TIP: Notice the side pieces are glued slightly higher than the root edge of the main fin. This gives me some extra balsa on the sides to sand to a curve to the body tube later.


No comments:
Post a Comment