To get a "wet" look finish, the final coat is sprayed on heavier.
For a more even coverage of the heavy coat I had to paint the final coat in two stages.
The fins were sprayed first, I wasn't concentrating on the body tube as much.
The fillet area did get a good part of the heavy final coat though.
After the fins were dry, and I was happy with the gloss wet coat coverage, the fins were masked off down the fillet line.
I used masking tape on this. Because the fins are the same color as the body, the sharpest line mask wasn't needed.
After the white body color dried, the mask was pulled up.
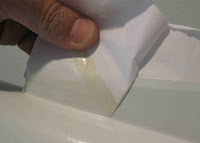
Pull up the mask at the angle shown, the same way you would pull away any mask.
In the recess of the fillet area, the mask line (or ridge) will be invisible.
 I only had one fillet area where the ridge was evident.
This is a simple fix.
The area was first brushed over with a dry brush to remove some of the loose paint ridge.
A new, clean piece of 400 grit was folded in half.
TIP: Use a new clean piece so no previously sanded color could transfer onto the white paint.
LIGHTLY sand the paint ridge, just enough to knock down the ridge.
Don't overdue it, just a few light passes to remove the visible ridge.
You shouldn't need to sand down every fillet area. just the one or two that are evident to the naked eye.


No comments:
Post a Comment